Step 3 - Confirm Product Reception
1. How to perform product reception
Assuming that a product shipment was initiated and then confirmed:
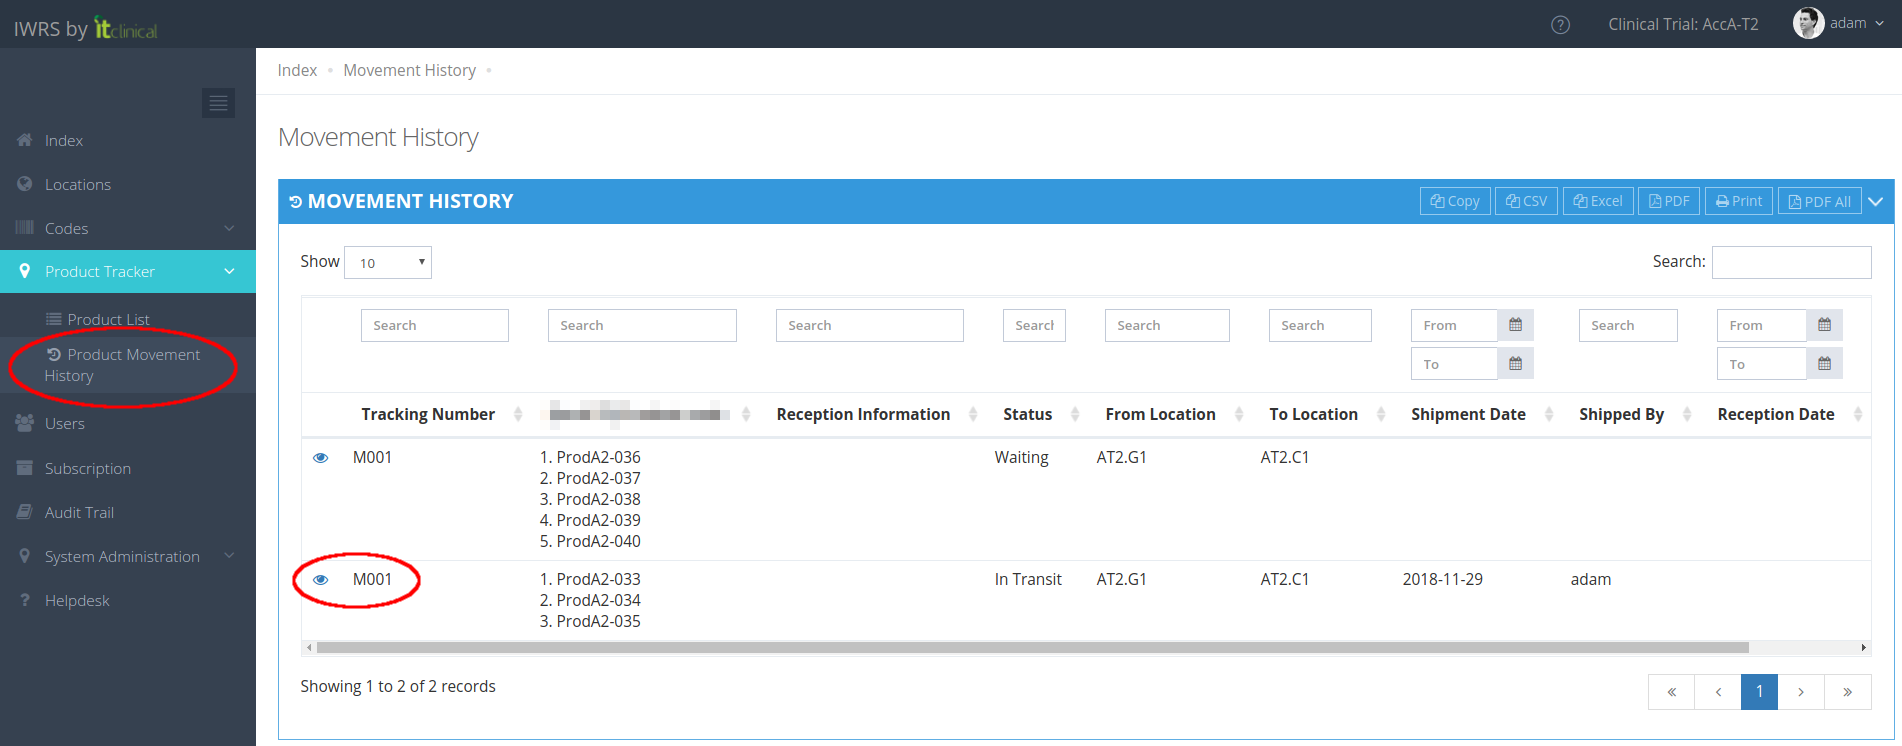
1. Go to Product Movement History page (available under Product Tracker menu or in Welcome Page).
2. Click shipment details button corresponding to the shipment you want to confirm reception (eye icon).
Note: Product reception can only be performed for shipments with Status "In Transit".
3. Confirm the reception information for each product:
3.1. Write your name (Receiver) and date of reception (Reception Date).
3.2. Identify for each product, individually or in bulk, whether it has arrived in good condition or damaged.
3.3. Click Confirm Reception at the bottom.

Note: products marked as Damaged will be inactivated and will not be available for dispensing:

Note: products previously received as Damaged and later edited to Good condition will not be automatically re-activated. Should you want to make these products available to be used, users with corresponding permission can manually activate them from Products List page.
2. Additional Product damaged conditions
Trials can also be configured with a predefined list of "Damaged conditions" (e.g. temperature excursion, missing, damaged). Individual or bulk selection is available.

Note: products marked with a predefined Damaged Condition will be inactivated and will not be available for dispensing.
Note: products previously received as Damaged and later edited to Good condition will not be automatically re-activated.Should you want to make these products available to be used, users with corresponding permission can manually activate them from Products List page.
Related Articles
Step 2 - Cancel, Confirm and Edit Shipment
1. Cancel Shipment When in "Waiting" status, shipments can be canceled. If you cancel the shipment, products will be left in the origin location and the Shipment Status will be "Cancelled". 2. Confirm Shipment After initiating a shipment the shipment ...Step 1 - Initiate Product Shipments
1. How to initiate a product shipment 1. Go to Product List page (available under Product Tracker menu or in Welcome Page). 2. Select the products for shipment by ticking their checkboxes in the Create Movement column. 3. When you select a product, a ...Product Returns
1. Return a Product A product may only be returned if it's inactive. For example, if a product is damaged/expired, you need to return it and should follow the next steps: 1. Go to the Product List page. 2. Choose the inactive product you want to ...Edit Product Details
1. Edit Product Details 1. From the Product List access a selected product's details page. 2. Edit product details and "Submit". Note: When editing a product's details, the Expiry Date field is mandatory in order to submit changes. An error message ...Import Product Information
Note: Depending on your account permissions/configuration, you may be able to import products' information to IWRS. 1. How to import products' information 1. Go to Import Products page (available under Product Tracker menu). 2. Select the CSV file ...